Web库Gradio
1. 简介
Gradio是一个开源库,用于快速原型设计和部署机器学习模型的交互式界面。它提供了简单易用的接口,让用户能够轻松创建和展示机器学习模型,以及与其交互。
gitee地址:https://gitee.com/mirrors/gradio
本文涉及的部分代码见XEdu帮助文档配套项目集:https://www.openinnolab.org.cn/pjlab/project?id=64f54348e71e656a521b0cb5&sc=645caab8a8efa334b3f0eb24#public
2. 安装
Gradio可以采用pip命令安装,具体如下:
pip install gradio
3. 代码示例
下面是一个使用Gradio创建一个简单交互式界面的示例代码:
import gradio as gr

def greet(name):
    return f"Hello {name}!"

iface = gr.Interface(fn=greet, inputs="text", outputs="text")
iface.launch()
上面的示例中,定义了一个名为"greet"的函数,它接受一个名字作为输入,并返回一个带有问候语的字符串。然后使用gr.Interface创建一个接口,指定输入类型为文本,输出类型也为文本。最后,使用launch方法来启动界面。运行效果如下:

在网页中输入文字“xedu”后即可输出“Hello xedu”。函数“greet”的参数就是input的信息,返回的信息就输出到网页,好容易理解。
技巧强调
我们知道浦育平台的容器是“藏”在网页背后的虚拟服务器(电脑),网页和Notebook作为交互接口,我们没有办法直接连接访问。而只要在launch()中增加参数“share=True”,就可以穿透内网直接用域名访问。也就是说,你随时可以把这个代码成为一个网页服务,让所有人都能访问!
如需让同一局域网下的设备访问,则可在最后一句iface.launch()中增加参数server_name。例如:iface.launch(server_name="0.0.0.0")。这样,其他设备就可以通过你的局域网 IP 地址访问该应用了,下同。
4. 借助Gradio部署简易AI应用
Gradio提供了多种部署选项,使您能够将您的智能应用部署到各种环境中。您可以将您的智能应用程序共享给其他人使用,无论是作为演示、原型验证还是实际应用。Gradio使部署变得简单而高效,让您能够专注于构建优秀的机器学习模型和交互式界面。
借助Gradio部署MMEdu模型
下面是一段Gradio调用MMEdu训练的图像分类模型的代码,运行这段代码,Gradio将启动一个交互式界面,您可以在其中上传图像并查看模型的预测结果。您需确保可以导入MMEdu库,且有MMEdu训练的模型,如何安装MMEdu和使用MMEdu训练模型,可参照前文。
import gradio as gr
from MMEdu import MMClassification as cls
model = cls(backbone = 'LeNet')
checkpoint='best_accuracy_top-5_epoch_4.pth'
def predict(img):
    result = model.inference(image=img, show=False, checkpoint=checkpoint)
    return str(result)
image = gr.inputs.Image(type="filepath")
iface = gr.Interface(fn=predict, inputs=image, outputs=gr.outputs.Textbox())
iface.launch(share=True)
运行效果如下:
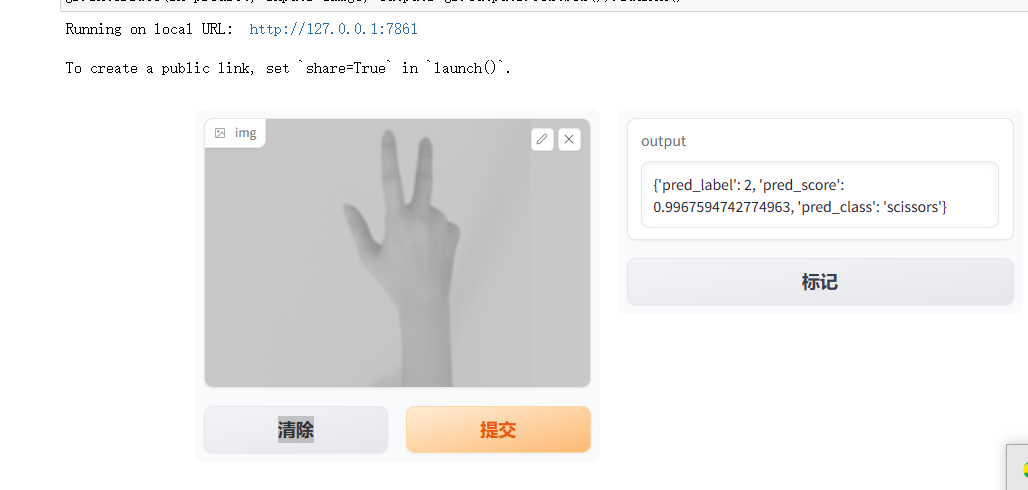
您可以根据您的模型进行相应的修改和调整,以适应您的需求。例如对输出结果做一些修饰,参考代码如下:
import gradio as gr
from MMEdu import MMClassification as cls
model = cls(backbone = 'LeNet')
checkpoint='checkpoints/cls_model/hand_gray/latest.pth'
def predict(img):
    result = model.inference(image=img, show=False, checkpoint=checkpoint)
    texts = []
    texts.append('Pred_label: {}'.format(result['pred_label']))
    texts.append('Pred_score: {:.2f}'.format(result['pred_score']))
    texts.append('Pred_label: {}'.format(result['pred_class']))
    text = '\n'.join(texts)
    return text

image = gr.inputs.Image(type="filepath")
iface = gr.Interface(fn=predict, inputs=image, outputs=gr.outputs.Textbox())
iface.launch(share=True)
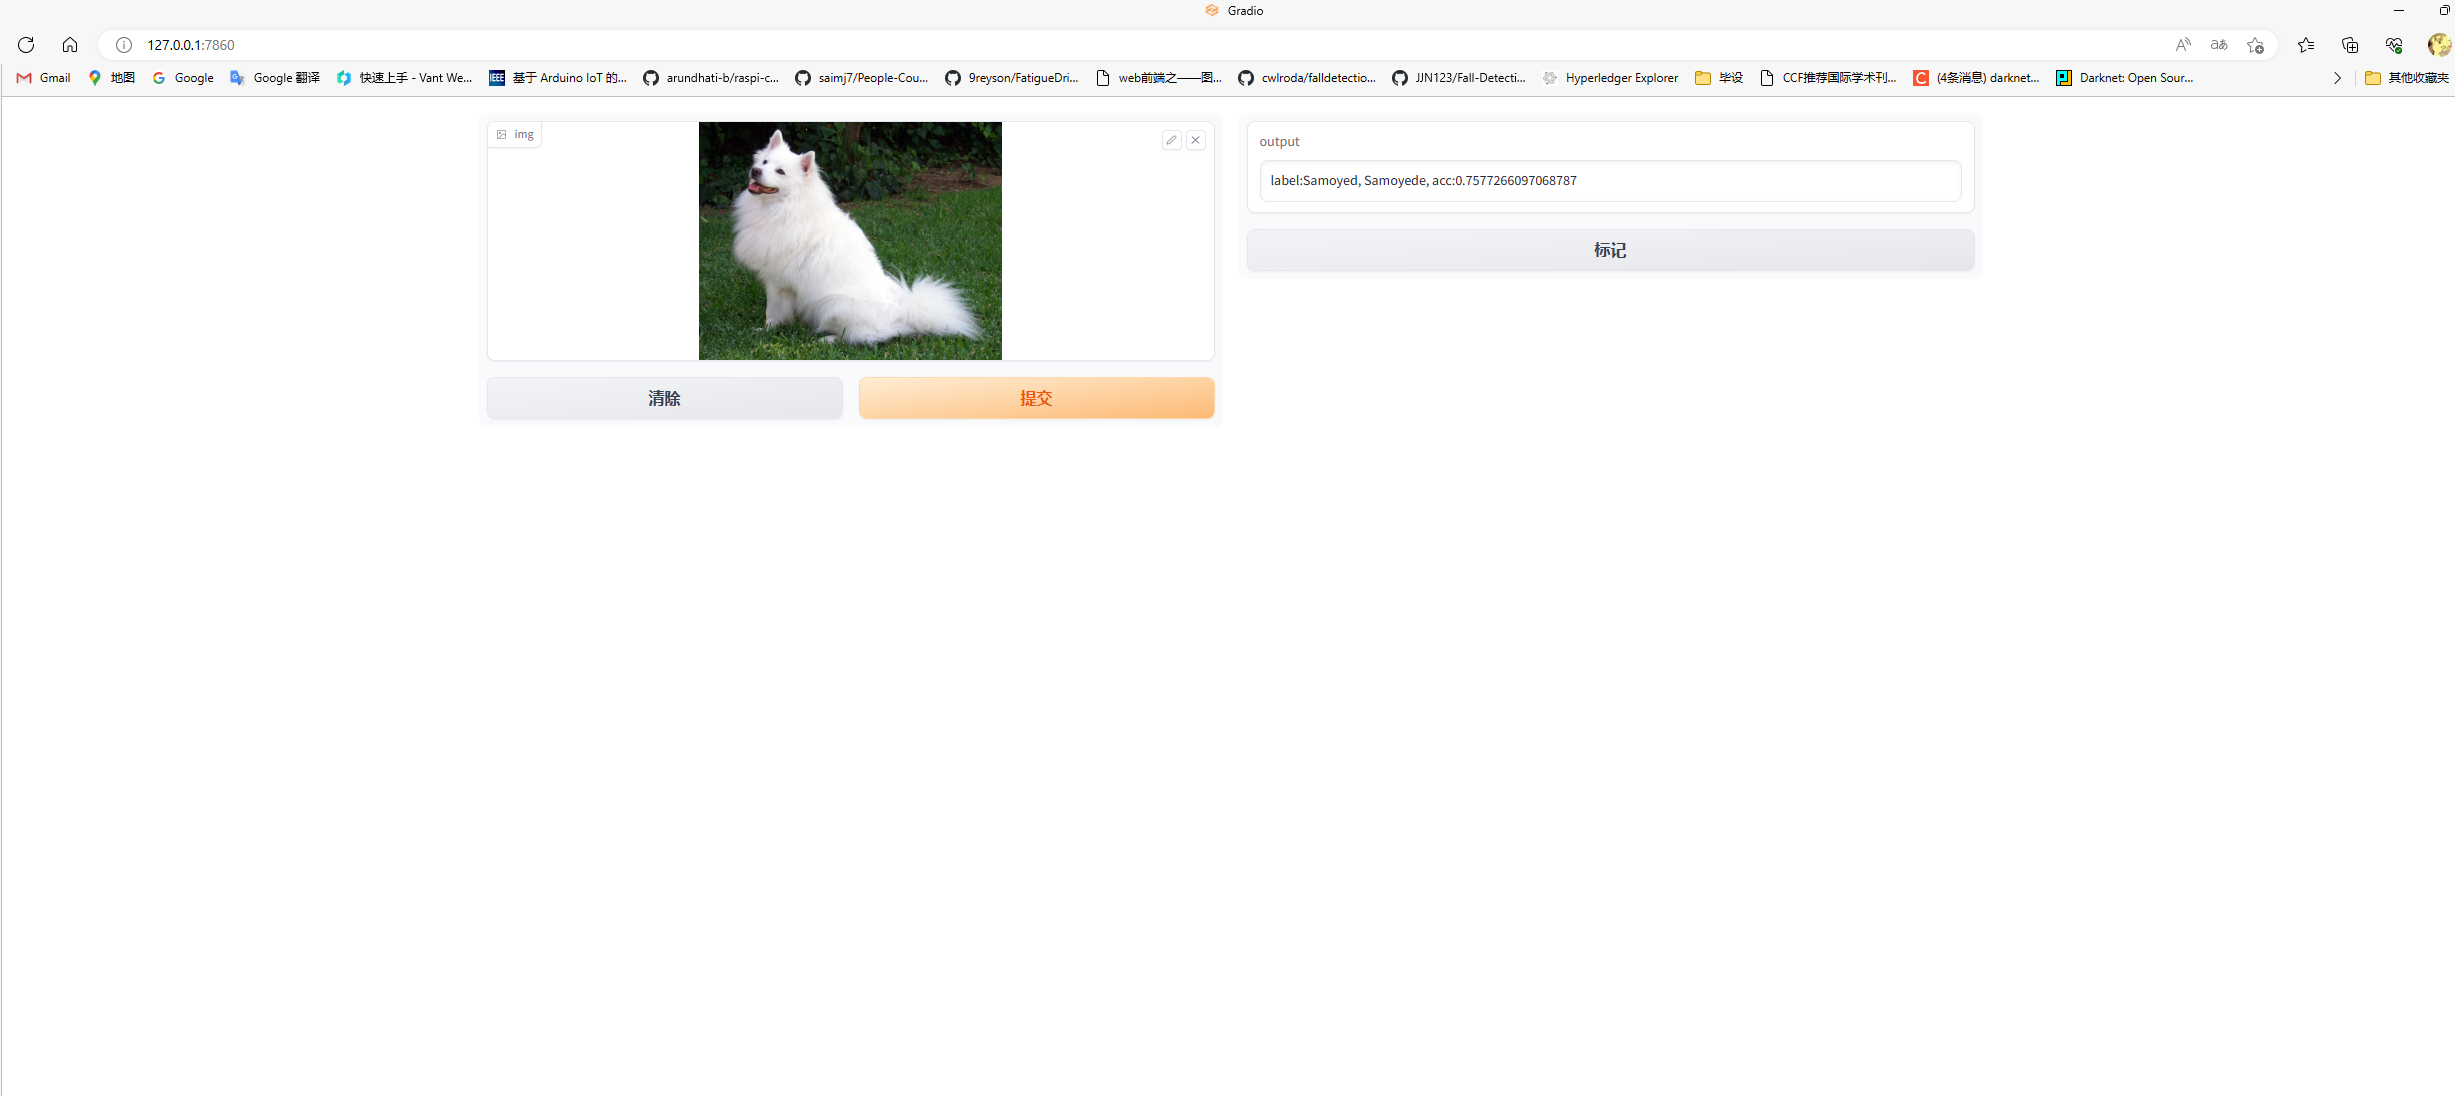
借助Gradio部署ONNX模型
使用Gradio部署ONNX模型也是非常简单的,示例代码如下:
补充:ONNX(Open Neural Network Exchange)是一个开放的、跨平台的深度学习模型表示和转换框架。它的目标是解决不同深度学习框架之间的模型兼容性问题,此处使用的ONNX模型推理的代码是借助XEdu团队推出的模型部署工具BaseDeploy,代码较为简洁。关于基于MMEdu训练的模型转换为ONNX的说明可见最后一步:AI模型转换与部署。
import gradio as gr
from XEdu.hub import Workflow as wf

model_path = 'cls.onnx'
def predict(img):
    model = wf(task='mmedu',checkpoint=model_path)
    result = model.inference(img)
    return result
image = gr.inputs.Image(type="filepath")
iface = gr.Interface(fn=predict, inputs=image, outputs=gr.outputs.Textbox())
iface.launch(share=True)
运行效果如下: