wifi摄像头模块:ESP32-CAM
1.简介
ESP32-CAM是一个小巧但功能强大的摄像头模块,非常适合DIY爱好者和科创项目。它可以连接Wi-Fi和蓝牙,让你轻松地进行图像捕获和视频流处理。无论你是想做一个智能小车,还是想在家里安装一个简易的监控系统,ESP32-CAM都是一个很好的选择。
网上有多种配置教程,下文简单介绍一种配置ESP32-CAM的方式以及简单应用【注:不同配置方式涉及的库及使用方法会略有不同】。
2.简单使用教程
第一步:购买ESP32-CAM
a.在淘宝、京东查找ESP32-CAM,购买一款合适的产品。
b.核对规格:确保购买的是ESP32-CAM模块,它通常包括一个小型摄像头模块(摄像头模块可能需要自行安装)。
c.USB接口的线,配合ESP32-CAM连接。
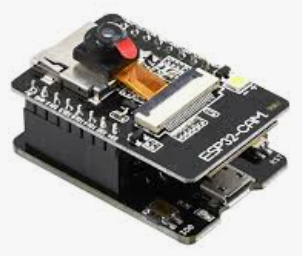
注:不同型号的配置方式也可能有所不同,本教程适用的ESP32-CAM如下图所示。
第二步:准备编程环境
a.下载并安装arduino IDE
这是一个编程软件,可以让你给ESP32-CAM编写和上传代码。
下载地址:https://www.arduino.cc/en/Main/Software?setlang=cn
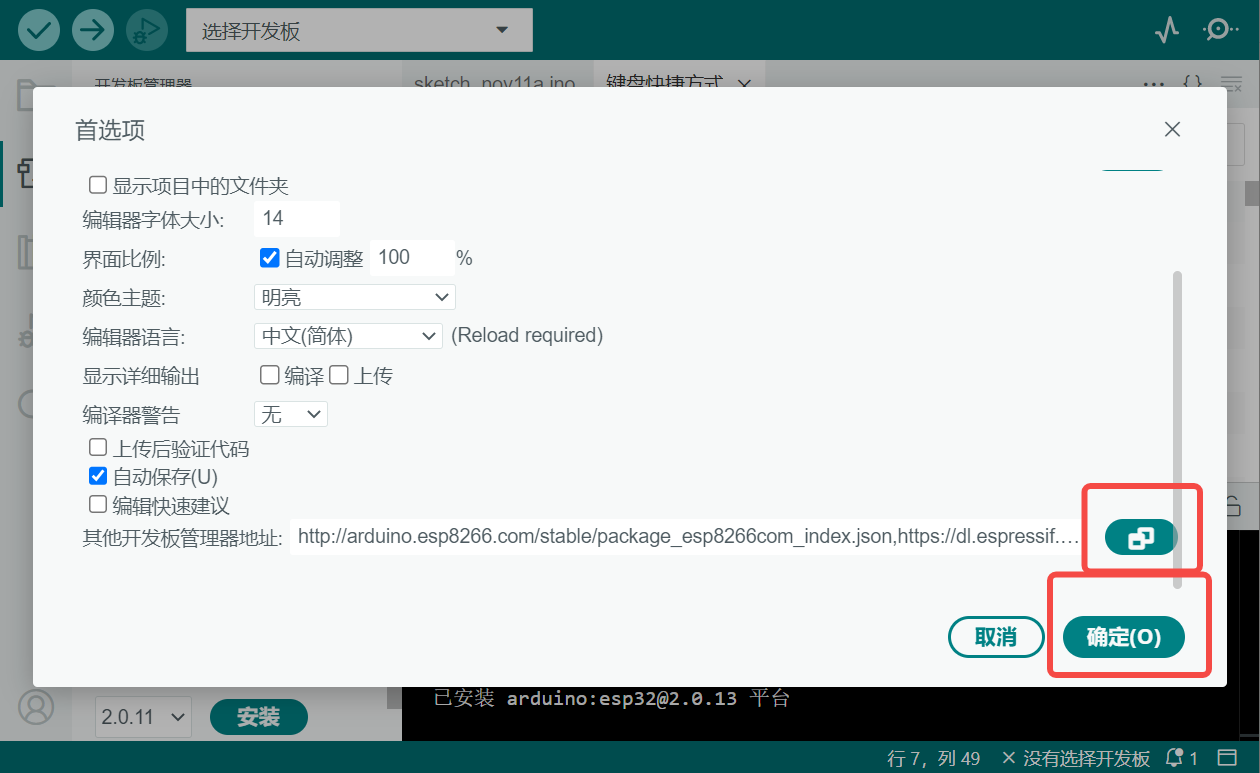
b.下载完成后打开arduino IDE选择首选项
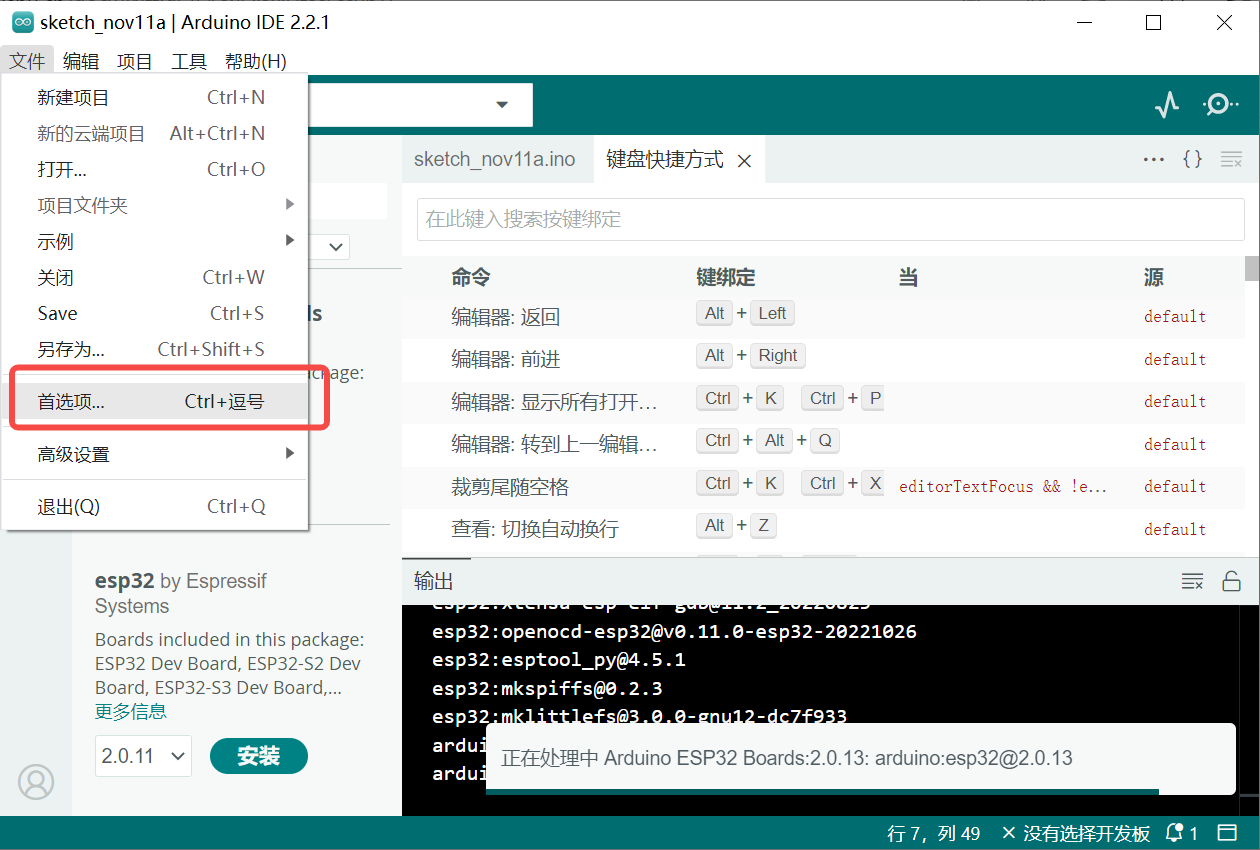
打开配置后,添加附加开发板管理器网址(可直接复制下面的网址)
https://dl.espressif.com/dl/package_esp32_index.json
http://arduino.esp8266.com/stable/package_esp8266com_index.json
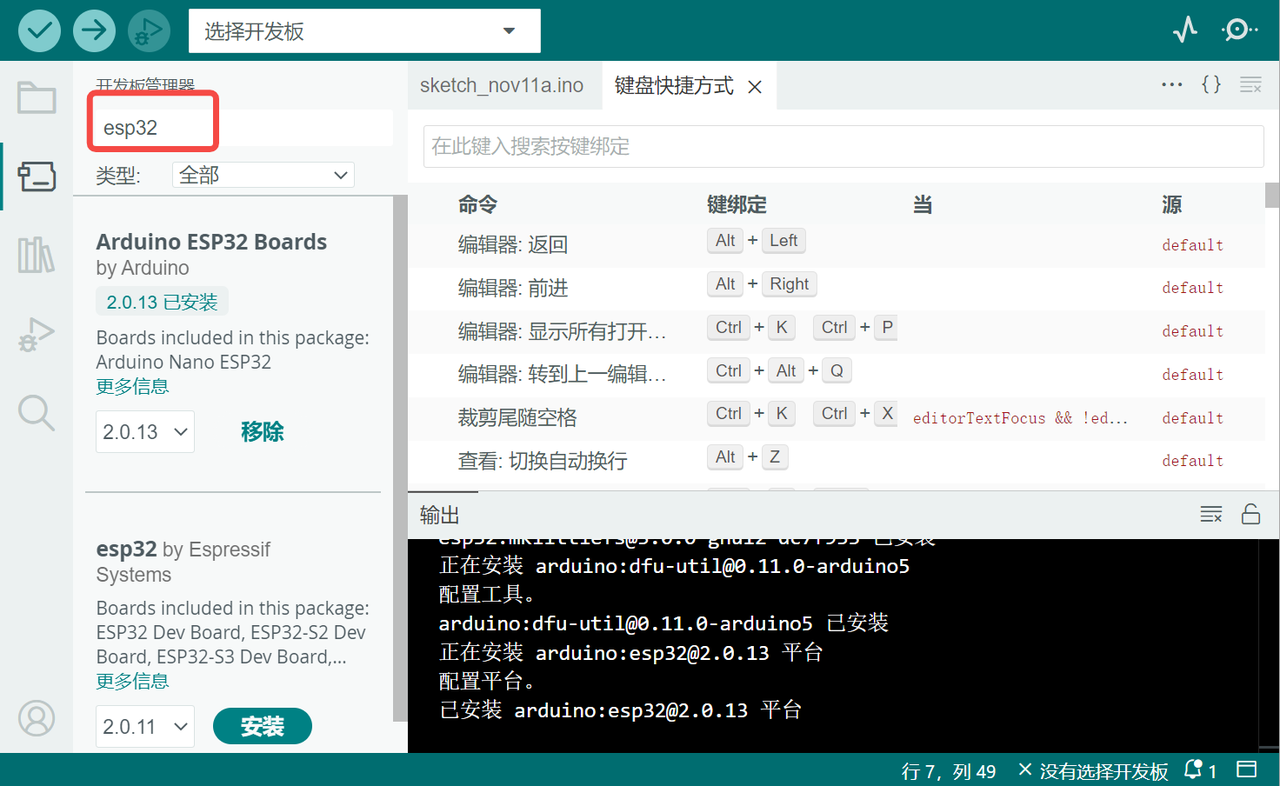
c.打开工具-开发板管理器,然后搜索esp32
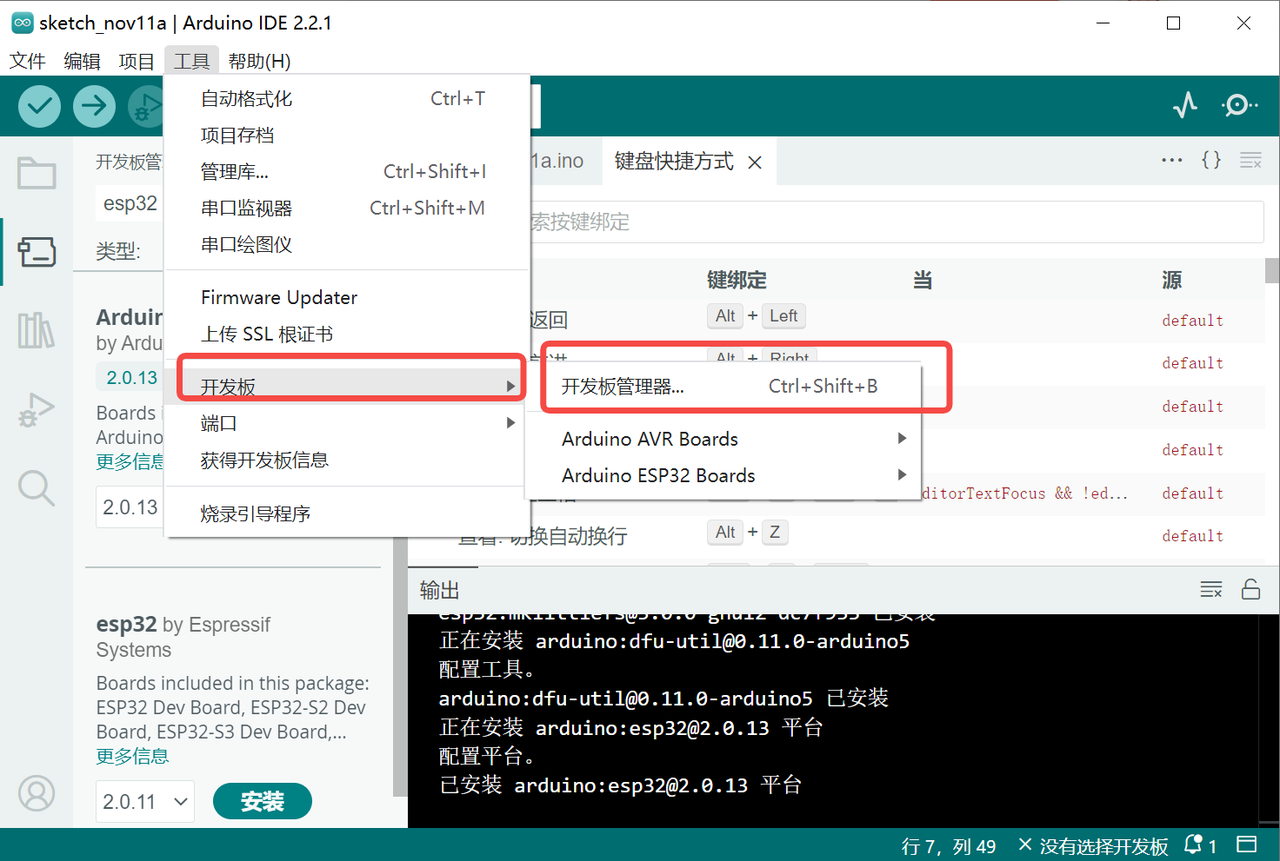
选第二个esp32 by Espressif点击安装,等待安装完毕
如因网速原因安装较慢可使用离线方法,相关文件和安装方法已上传百度云盘。
链接:https://pan.baidu.com/s/1T2vqBC2903NnPU-Cv-Qolw 提取码:bpri
第三步:连接ESP32-CAM至电脑
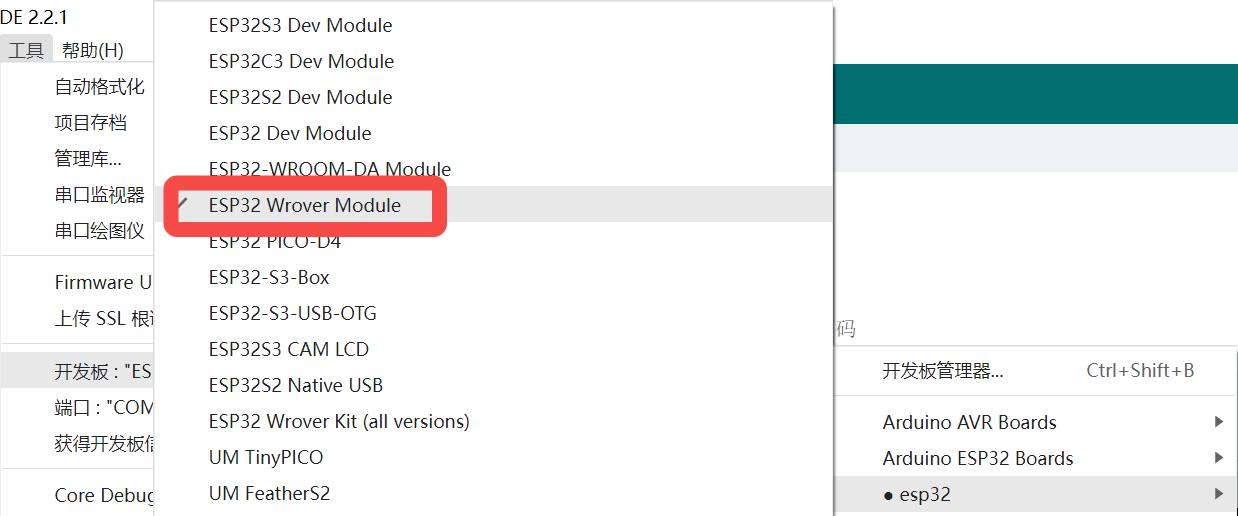
将ESP32-CAM模块通过转换器连接到电脑,并在arduino ide中选择连接,工具-开发板-ESP32-esp32 Wrover Module【上一步顺利完成此步骤才会出现此选项】
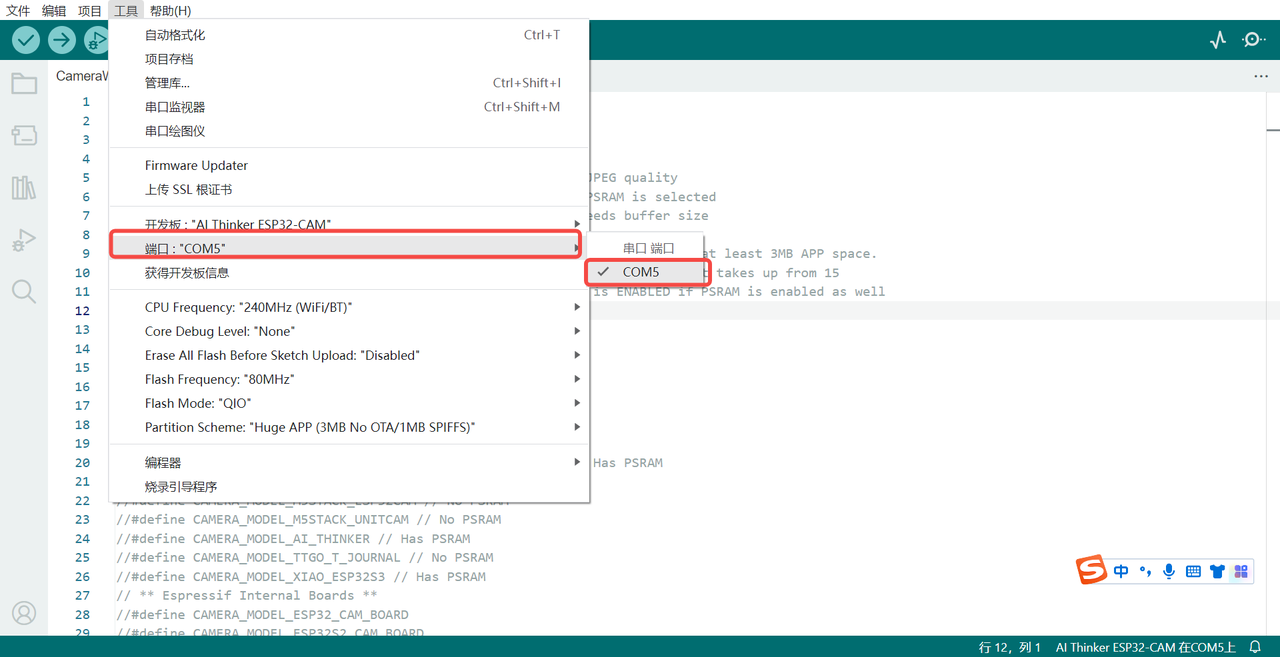
工具-端口选择COM5,如果无法识别,可能需要安装对应的COM驱动,如CH341SER.EXE。
第四步:编写配置WIFI的代码
a.获取编程示例
ESP32 CAM Live Video Streaming in Python OpenCV的示例代码是:
#include <WebServer.h>
#include <WiFi.h>
#include <esp32cam.h>

const char* WIFI_SSID = "请写入你的WIFI账号";
const char* WIFI_PASS = "请写入你的WIFI密码";

WebServer server(80);


static auto loRes = esp32cam::Resolution::find(320, 240);
static auto midRes = esp32cam::Resolution::find(350, 530);
static auto hiRes = esp32cam::Resolution::find(800, 600);
void serveJpg()
{
  auto frame = esp32cam::capture();
  if (frame == nullptr) {
    Serial.println("CAPTURE FAIL");
    server.send(503, "", "");
    return;
  }
  Serial.printf("CAPTURE OK %dx%d %db\n", frame->getWidth(), frame->getHeight(),
                static_cast<int>(frame->size()));

  server.setContentLength(frame->size());
  server.send(200, "image/jpeg");
  WiFiClient client = server.client();
  frame->writeTo(client);
}

void handleJpgLo()
{
  if (!esp32cam::Camera.changeResolution(loRes)) {
    Serial.println("SET-LO-RES FAIL");
  }
  serveJpg();
}

void handleJpgHi()
{
  if (!esp32cam::Camera.changeResolution(hiRes)) {
    Serial.println("SET-HI-RES FAIL");
  }
  serveJpg();
}

void handleJpgMid()
{
  if (!esp32cam::Camera.changeResolution(midRes)) {
    Serial.println("SET-MID-RES FAIL");
  }
  serveJpg();
}


void  setup(){
  Serial.begin(115200);
  Serial.println();
  {
    using namespace esp32cam;
    Config cfg;
    cfg.setPins(pins::AiThinker);
    cfg.setResolution(hiRes);
    cfg.setBufferCount(2);
    cfg.setJpeg(80);

    bool ok = Camera.begin(cfg);
    Serial.println(ok ? "CAMERA OK" : "CAMERA FAIL");
  }
  WiFi.persistent(false);
  WiFi.mode(WIFI_STA);
  WiFi.begin(WIFI_SSID, WIFI_PASS);
  while (WiFi.status() != WL_CONNECTED) {
    delay(500);
  }
  Serial.print("http://");
  Serial.println(WiFi.localIP());
  Serial.println("  /cam-lo.jpg");
  Serial.println("  /cam-hi.jpg");
  Serial.println("  /cam-mid.jpg");

  server.on("/cam-lo.jpg", handleJpgLo);
  server.on("/cam-hi.jpg", handleJpgHi);
  server.on("/cam-mid.jpg", handleJpgMid);

  server.begin();
}

void loop()
{
  server.handleClient();
}
b.新建文件,将上述代码复制到新文件中,编写Wi-Fi代码,包括指定Wi-Fi账号和密码(第五、六行代码WIFI_SSID和WIFI_PASS),其他不变。【注意:此时先不要上传代码】
第五步:安装esp32cam库
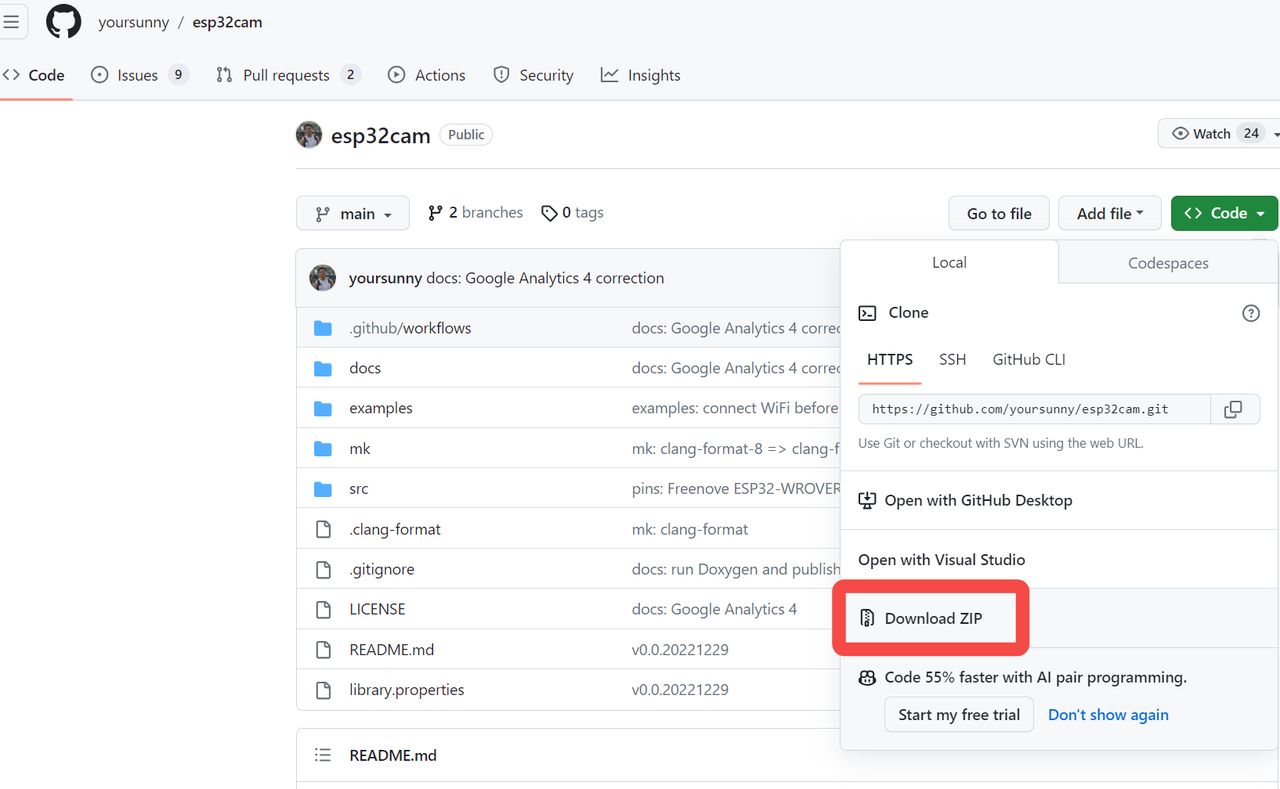
a.下载esp32cam库
下载地址:https://github.com/yoursunny/esp32cam
b.导入库
项目-导入库-添加.ZIP库

第六步:上传代码并获取IP地址
单击上传按钮上传代码
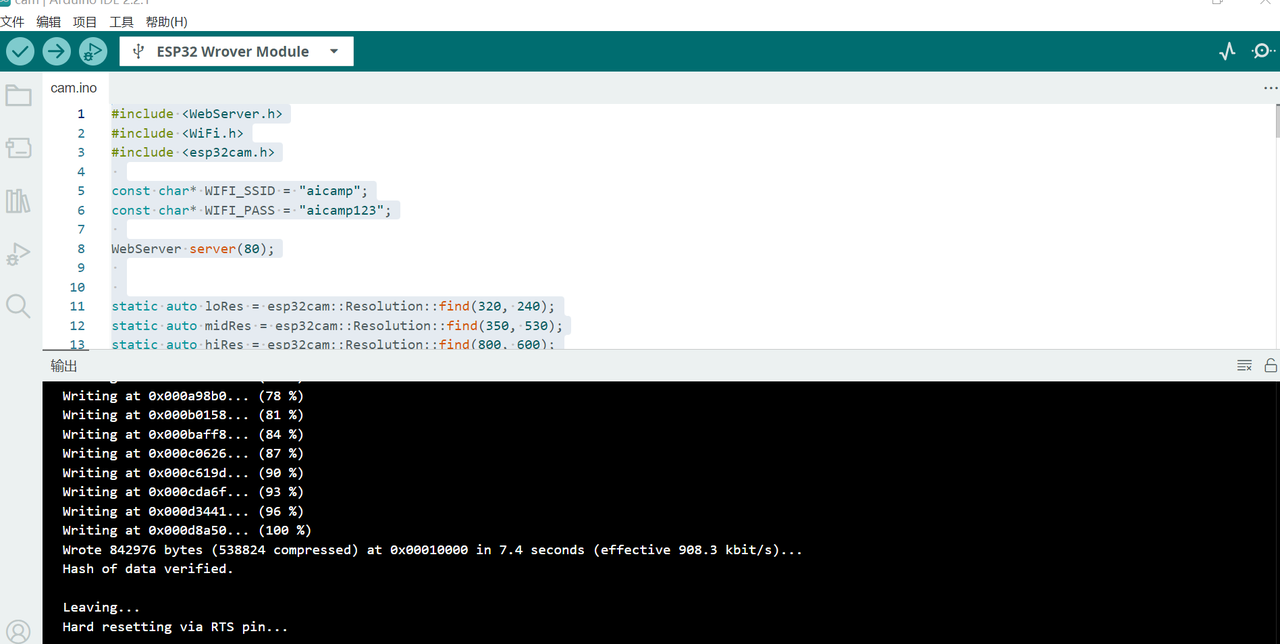
上传代码后点击esp32cam的reset键,重启esp32cam,可打开串口监视器,查看上传代码的运行情况(示例代码会输出相关ip和路径)

下图中是串口监视器里输出的结果(如没有输出可增大默认的波特率)
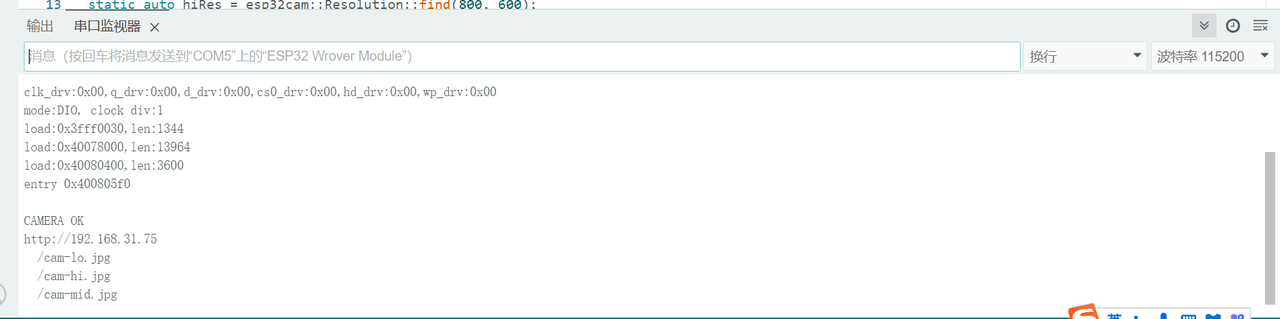
可以发现在串行监视器的IP地址下,会看到三种不同的图像分辨率 lo、hi 和 mid,根据需求使用一个。
例如我们可以使用http://192.168.31.75/240x240.jpg,使用浏览器打开即可看到摄像头拍摄的照片,手动刷新可以看到拍摄到的一张张照片。
也可以用下面的python代码来查看串口输出的IP信息。
'''
这段代码不需要理解
仅用作读取摄像头配置信息

1.连接摄像头数据线到电脑上(驱动)
2.点击代码运行按钮
3.点击摄像头上的“EN/RST”

详解见:https://xedu.readthedocs.io/zh-cn/master/how_to_use/scitech_tools/camera.html
'''
import serial
import serial.tools.list_ports
import time

def find_serial_ports():
    return serial.tools.list_ports.comports()

def read_from_port(ser):
    while True:
        if ser.in_waiting > 0:
            # 读取一行,直到遇到换行符
            line = ser.readline().decode('utf-8').rstrip()
            print(f'Received: {line}')
# 检测所有可用的串口
ports = find_serial_ports()
for port_info in ports:
    port = port_info.device
    print(f'Found port: {port}')
    try:
        # 尝试打开串口,设置波特率
        with serial.Serial(port, 115200, timeout=1) as ser:
            print(f'Opened {port}. Starting to read data...')
            # 给设备一点时间来初始化
            time.sleep(2)
            # 开始读取数据
            read_from_port(ser)
    except serial.SerialException:
        print(f'Cannot open {port}. It might be in use or not available.')
# 如果没有找到串口,则打印消息
if not ports:
    print('No available serial ports found')
注:同一个WIFI下IP地址不会发生变化。
3.简单应用:在Python中测试实时视频流
由前文可知通过ESP32-CAM获取的是一张照片,如果编写代码一直读就是视频流了。下面这段代码是连接esp32cam摄像头,获取视频流并将图片展示在窗口(需要将代码中的ip改为上述串口监视器中输出的ip)的参考代码。
import cv2
import urllib.request
import numpy as np

url = 'http://192.168.31.75/240x240.jpg' # 填写串口监视器中输出的ip地址
cv2.namedWindow("live Cam Testing", cv2.WINDOW_AUTOSIZE)

# 创建VideoCapture对象
cap = cv2.VideoCapture(url)

# 检查是否成功打开摄像头
if not cap.isOpened():
    print("Failed to open the IP camera stream")
    exit()

# 读取并显示视频帧
while True:
    img_resp=urllib.request.urlopen(url) #通过URL请求获取一帧图像
    imgnp=np.array(bytearray(img_resp.read()),dtype=np.uint8) # 将获取的图像转换为numpy数组
    im = cv2.imdecode(imgnp,-1) # 解码图像
    im = cv2.flip(im, 1) # 将图像水平翻转,1代表水平翻转

    # 在窗口中显示图像
    cv2.imshow('live Cam Testing',im)
    key=cv2.waitKey(5)
    if key==ord('q'): # 按q键退出循环
        break

cap.release() # 释放VideoCapture对象
cv2.destroyAllWindows() # 关闭所有OpenCV创建的窗口
在此基础上,可继续编写更复杂的python代码,例如对接收的照片进行各种模型推理的操作,甚至还可以连接小车做一个无人行驶小车(例如有人对ESP32-CAM进行了封装组装成了一款JTANK履带车,我们在其基础上制作成了一辆识行小车)。
借助ESP32-CAM还能连接SIOT做各种智联网应用,下面这段代码的主要功能是读取摄像头图片,借助XEduHub完成手部检测,再向MQTT服务器发送消息,在此代码基础上,相信可以做出更多创意应用。
import cv2
from XEdu.hub import Workflow as wf
import siot
from time import sleep
import numpy as np
import urllib.request

SERVER = "iot.dfrobot.com.cn"            #MQTT服务器IP
CLIENT_ID = "1234"                  #在SIoT上,CLIENT_ID可以留空
IOT_pubTopic  = 'tgzrRLVIg'       #“topic”为“项目名称/设备名称”
IOT_UserName ='75HzWwL7R'            #用户名
IOT_PassWord ='ncNkZQL7Rz'         #密码

siot.init(CLIENT_ID,SERVER,user=IOT_UserName,password=IOT_PassWord)
siot.connect()
siot.loop()
siot.publish_save(IOT_pubTopic, 'stop')

#print("Before URL")rtsp://[username]:[password]@192.168.1.64/1'
url = 'http://192.168.31.94/240x240.jpg'
cap = cv2.VideoCapture(url)

# Check if the IP camera stream is opened successfully
if not cap.isOpened():
    print("Failed to open the IP camera stream")
    exit()

#print("After URL")
model=wf(task='det_hand')
print(model)
cmd=''
last=''
while True:
    img_resp=urllib.request.urlopen(url)
    imgnp=np.array(bytearray(img_resp.read()),dtype=np.uint8)
    # 将图像水平翻转
    frame = cv2.imdecode(imgnp,-1)
    frame = cv2.flip(frame, 1)
    r,img=model.inference(data=frame,img_type='cv2',thr=0.6)
    cv2.imshow("Capturing",img)
    #print('Running..')
    if len(r)>0:
        cmd='stop'
    else:
        cmd='go'

    if cmd!=last:
        siot.publish_save(IOT_pubTopic, cmd)
        last=cmd
    #sleep(0.1)
    if cv2.waitKey(1) & 0xFF == ord('q'):
        break

cap.release()
cv2.destroyAllWindows()